Самое актуальное и обсуждаемое


Популярное

25 правил женского этикета
Правила поведения детей за столом
Старайтесь приучать ребенка к правилам поведения за столом с раннего...
42
0
0

85 умильных фото спящих кошек, которые своим видом поднимут настроение до 100 процентов (особенно полезно для тех, у кого стресс)
Есть ли случаи, когда нужно обращаться к ветеринару?
Записаться на обследование в ветклинику следует...
42
0
0

50 эффективных аффирмаций от лучших психологов мира
Толкование
Этот термин происходит со времен Древней Греции. Он означает взаимодействие души и тела....
28
0
0
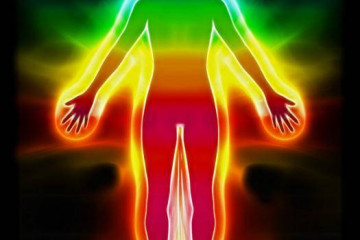
24 практики для защиты, усиления и восстановления ауры и биополя
Исследование нарушений обоняния при COVID-19
Первые данные о нарушении обоняния стали появляться...
38
0
0

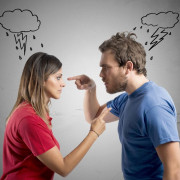
7 советов, как сохранить любовь на расстоянии
Твой образ жизни должен соответствовать его ценностям.
Вот простой пример. Мужчина активно занимается...
34
0
0

10 причин, почему мужчина боится женщину, в которую влюблен
Почему мой мужчина боится обязательств?
Если твой мужчина опасается посвятить себя тебе, есть несколько...
36
0
0
12 книг, которые стоит подарить девочке-подростку, несмотря на то, что они
Лучшие книги для девочек подростков, которые научат любить школу
Основная проблема подростков на данный...
32
0
0
24 феноменально реалистичных рисунка карандашом
Книга Гравити Фолс — как нарисовать карандашом
Гравити Фолс – это популярный у детей мультсериал. Один...
32
0
0
Полезные советы

Важно знать!
12 цветотипов внешности
Характерные черты
Вспомните, чем отличается это время года, какие краски можно увидеть вокруг? Рыжая, желтая, багряная листва, темно-зеленая трава, неяркое оранжевое солнышко, насыщенные тона осенних...
Читать далее
10 лучших схем, как сделать самолет из бумаги
25 сильных фильмов со смыслом
11 признаков красоты, которые привлекают мужчин, и раздражают женщин
7 книг, которые помогут научиться грамотно и красиво говорить
7 основных правил воспитать ребенка лидером
10 советов, как защититься от собак на пробежке
100 интересных вопросов девушке, чтобы её заинтересовать и больше о ней узнать
10 механизмов психологической защиты, и как научиться их распознавать
7 распространенных причин, почему девушки отказываются от свиданий
Рекомендуем


Лучшее

Важно знать!
9 неочевидных вещей, которые указывают на ваше аристократическое происхождение
Внешний вид
Естественным признаком хорошего тона является внешний вид аристократа. Одежда всегда аккуратна, собрана и отточена. Костюм должен быть классическим и строгим, брюки с отглаженной стрелкой,...
Читать далее
100 причесок для девочек в садик на каждый день
15 нужных книг для подростков
60 стильных причесок для волос средней длины
3д поделки из бумаги: животные, дома, цветы, оригами и предметы
3d поделки
15 лучших книг о психологии отношений
6 шагов, как избавиться от застенчивости
8 русских фильмов и сериалов с высоким рейтингом, которые стали хитами за пределами россии
25 самых интересных книг с захватывающим сюжетом от которых невозможно оторваться
Новое


Обсуждаемое

Важно знать!
18 признаков, что женщине нравится мужчина, но она пытается скрыть
Вы начинаете по-другому мыслить и действовать
Первые признаки влюбленности будут проявляться в вашем мышлении и поведении. В ваше тело и разум будут «выделяться определенные вещества», когда вы влюбляетесь...
Читать далее
100+ приятных фраз девушке, чтобы она улыбнулась и растаяла
3 причины почему бывший восстает из пепла, тоскует по тебе, и что с ним делать
20 способов убеждения людей
180 красивых комплиментов девушке
10 обнимашек счастья: польза объятий для тела и души
10 лучших книг всех времен
10 полезных советов как пользоваться приложением тиндер
17 самых приятных смс мужчине. он не устоит!
10 удивительно простых советов, как научиться красиво говорить
Популярное


Актуальное

Важно знать!
19 способов найти занятие себе по душе
Популярные хобби для подростков
У молодежи свои интересы.
Коллекционирование музыки. Все классные хиты на дисках или других носителях.
Подростки устраивают необычные флешмобы. Например, в одном из городов...
Читать далее
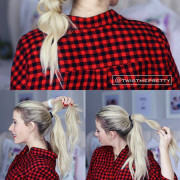
10 простых и очень крутых причесок на длинные волосы
17 признаков, что ты нравишься парню
10 магических фраз: слова, которые нужно говорить мужчине, чтобы влюбить его в себя
50 признаков влюбленного мужчины
22 добавки, которые можно добавить в слайм
55 отличных цитат о книгах и чтении
1 июля с макушкой лета! фото, гифки, стихи
120 комплиментов парню, после которых вы станете ближе
400+ открыток и картинок с 8 марта коллегам. поздравления женщинам
Обновления
 Статьи
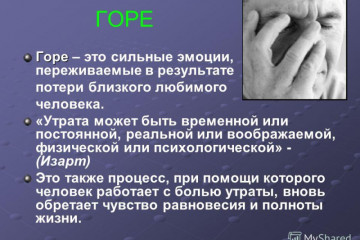
Справление с потерей близкого человека: советы и ресурсы для исцеления
Статьи
Справление с потерей близкого человека: советы и ресурсы для исцеления
Переживание потери близкого человека – это одно из самых болезненных испытаний, с которыми мы можем...
 Статьи
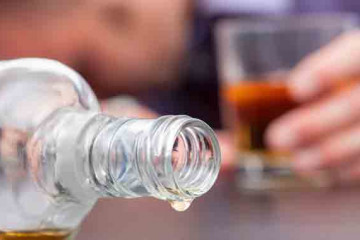
Психологические аспекты вывода из запоя: методы поддержки при преодолении зависимости от алкоголя
Статьи
Психологические аспекты вывода из запоя: методы поддержки при преодолении зависимости от алкоголя
Процесс вывода из запоя и преодоления зависимости от алкоголя является сложным и многогранным. В...
 Статьи
Вывод из запоя: эффективные методы для успешного преодоления
Статьи
Вывод из запоя: эффективные методы для успешного преодоления
Продолжительное употребление алкоголя и злоупотребление им, включая пьянство, имеют серьезные последствия...
 Статьи
Этапы и подходы вывода из запоя: медикаментозные препараты и стратегии
Статьи
Этапы и подходы вывода из запоя: медикаментозные препараты и стратегии
Продолжительное употребление алкоголя и злоупотребление им, включая пьянство, могут иметь серьезные...
 Статьи
Последствия и побочные эффекты длительного употребления алкоголя: риски и предосторожности
Статьи
Последствия и побочные эффекты длительного употребления алкоголя: риски и предосторожности
Продолжительное употребление алкоголя и злоупотребление алкоголем могут иметь серьезные последствия...
 Статьи
Лечение алкоголизма и преодоление запоя: эффективные методы и советы
Статьи
Лечение алкоголизма и преодоление запоя: эффективные методы и советы
Алкоголизм является серьезной проблемой, которая может оказывать разрушительное воздействие на здоровье...
 Статьи
Заработок на Севере: стоит ли рисковать ради высокой зарплаты?
Статьи
Заработок на Севере: стоит ли рисковать ради высокой зарплаты?
Последние годы на севере России происходит активное развитие промышленности, что приводит к росту зарплат...
 Статьи
Техника вакуумного и роликового массажа
Статьи
Техника вакуумного и роликового массажа
Массажная терапия - это популярный подход к расслаблению, снятию стресса и облегчению боли. Одной из...
 Статьи
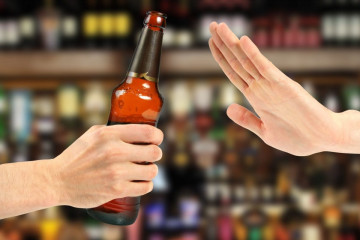
Преимущества и недостатки методов лечения алкоголизма
Статьи
Преимущества и недостатки методов лечения алкоголизма
Алкоголизм - это серьезная проблема, которая требует компетентного и своевременного лечения. Существует...
 Статьи
Почему выгодно взять кулер в аренду?
Статьи
Почему выгодно взять кулер в аренду?
В современном мире предприятия постоянно ищут инновационные способы снижения затрат и повышения рентабельности....
 Статьи
Как заплатить судебную задолженность: способы и сроки. и как проверить, что деньги дошли до фссп
Статьи
Как заплатить судебную задолженность: способы и сроки. и как проверить, что деньги дошли до фссп
Как проверить долги у судебных приставов?
Сегодня узнать долги физические лица могут несколькими способами,...
 Статьи
Лазерная эпиляция волос в вопросах и ответах
Статьи
Лазерная эпиляция волос в вопросах и ответах
Как происходит процедура
Во время восковой эпиляции волоски выдергиваются с корнем. Воск наносится...
Нашли ошибку, неточность или опечатку в тексте?
Выделите её и нажмите Ctrl + Enter
Выделите её и нажмите Ctrl + Enter